Showing posts with label Mad Skillz. Show all posts

Thursday, December 16, 2010

Block, blocking, blocked

When I was in marching band, lo those many years ago, we had an instructor who would say, "If you can say it, you can play it." I'm of the opinion that the saying works just as well for knitting.

Say it with me: block, blocking, blocked. See? Easy.

I would by lying if I told you it was quick. It's a little tedious, but the payoff is there. See?


DSC_0012
Meghan's Twist Cardigan, almost finished!
Here's what I did.

I wove my dressing (or blocking) wires up both outside edges, then through every single stitch on both outside edges of the cables. (Precision work like this totally tickles my OCD, for the record.) This sweater has beautiful shaping, so blocking it square would be positively criminal.

I used the same technique to block Meghan's Twist that I used for my own- to only block the edges and the cables so that the cables would pop. (This brilliant idea was shared by Kathy in San Jose.)
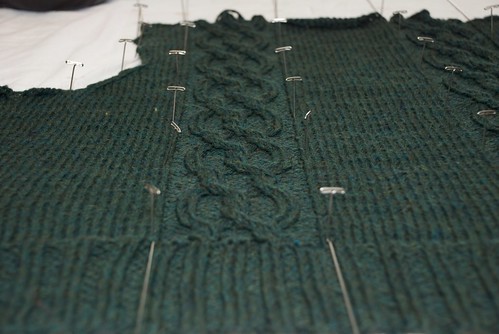
DSC_0013
It's a runway of cable-y goodness.

And BOY do they!

It took three episodes of Battlestar Galactica (two hours, fifteen minutes) to get it totally blocked- from setting up the Knitter's Blocks through steaming it. I know you're thinking "Two and a half hours? That's a lot of time."

Here's the payoff: the family has been living with this sweater. They've seen it nearly every day since I started swatching for it a few months back. Every single person who passes this sweater on the table stops to admire it, and comment on the difference that blocking has made. Every. Single. Person. (This makes me think that I really should have done a "before" picture. Next time.)

I love the effect of blocking. It really elevates the level of my work, and corrects a multitude of tiny inconsistencies. It also means spending some quality time with Steamy, and you know how I look forward to our encounters.

And for those of you who use the all-too-common "It'll block out," this goes doubly for you. It can't block out if you don't do the blocking.

Thursday, December 9, 2010

Diminished capacity

Today, I learned a new skill:

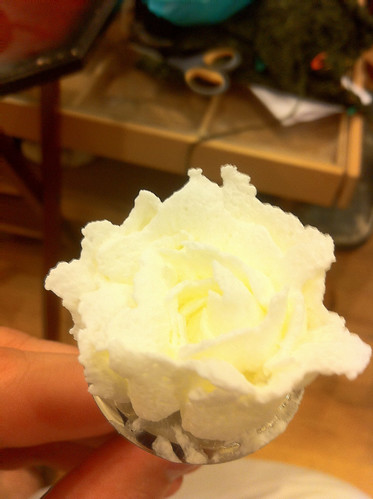
Rose
A thing of wonder and beauty

I learned how to make whipped cream roses. Since I'm a kinetic learner (meaning: I've got to do it to learn it), I bought a pint of whipped cream and practiced making roses while watching the newest episode of Glee.

The best way to learn how to make roses out of whipped cream (or anything out of whipped cream, for that matter) is to whip up a pint, sit with your family, practice the task, and then eat the results, rinse, repeat. You develop the skill, and your family consumes a ridiculous amount of whipped cream. It's a great activity for bonding the family, in my opinion.

(My favorite part was declaring the defective ones, then eating them. The good ones were admired for a moment before being consumed.)

As you can imagine, with that quantity of whipped cream Things were bound to ensue. Mom declaring that the next rose was hers (out of turn); Andrew screaming about whipped cream rose conspiracies. I might have kicked something over and declared the living room to be Sparta. (That's not an admission of guilt, it's just ... something that *could* have happened. Get my drift?)

In any case, in planning future activities, the following conversation took place between me and Laura'nge:

Laura'nge: So, I'll pick you up for yoga tomorrow?
Me: For the early class or the regular one?
Laura'nge: Wait, you're planning to go to two classes?
Me: I think I can do it, but it might be the whipped cream talking.

Monday, November 15, 2010

Andean ply

Last night, I came to the realization that I needed to take some pictures and do a ton of plying. Here's why:

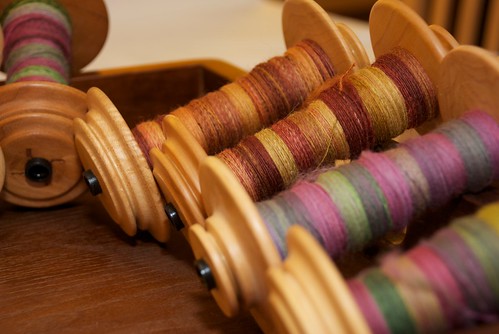
DSC_0006
(This tray has four sides, all of which are full of bobbins.)

Yes, the bobbins aren't full-full. They all have about 1 oz of fiber, which needed to be photographed before I could get it plied up. Thanks to my photography lesson with the incomparable Jade, a little fiddling with my lighting, the settings on my camera, and using my sweet external flash yielded some pretty good results.

So, I sat down to do some plying. I got busy and plied up the Crown Mountain Farms Blue Faced Leicester (from the Fiber of the Month Club), and I got to the end of one bobbin and realized that I still had 20ish yards of single left on the other bobbin.

I've been listening to the Yarnspinner's Tales Podcast at night. Cindy has a lovely voice, and is probably the most articulate person I've ever listened to, when it comes to the technical side of knitting. I'm listening back from the beginning, and in one of the episodes, she talks about Andean plying. For the first time, it really clicked. Basically, you make a center-pull ball around your wrist, and then ply from both ends.

Sounds simple enough, right? So, I decided to use the new skill I learned to finish off the end of the ball. (Normally, I would have Andrew walk back until the spare yardage was exhausted, and then ply until the yardage was done.)

In watching a video on how it's done, there are flashier ways than simply wrapping your wrist with single, but Cindy's description yielded some pretty spectacular results for having done it sight unseen. (You can see a YouTube video of the "right" way of doing it here.) I'm also super-pleased with myself for learning a new spinning skill.

My real motive for feeling the need to clear out bobbins?

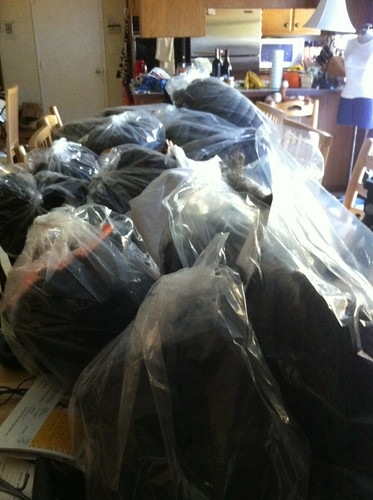
That's right, this is what 20 lbs of clean fleece from Morro Fleece Works looks like. My table? Not as spectacular.
My fleeces from Black Sheep Gathering 2010 have started arriving. They're big, beautiful, and demand to be spun.

Just like that disc of Mad Men demands to be watched. Coincidence? I think not.

Sunday, November 14, 2010

An afterthought

I've been knitting socks for a million years. However, as with all things, doing something for a long time doesn't necessarily make you an expert. I've basically knit the same pair of socks over and over again (with minor variations) about a million times.

My go-to vanilla pattern has a flap heel, though in college I did some experimentation and went through a period where all of my socks had garter stitch short-rowed heels. (Isn't that what college is about? Experimentation?) In any case, after college (like so many other girls) I went back to my standard flap heel.

If you listen to the podcast, you've heard my mom rave about how addictive afterthought heels are. If you're me, you hear it even more frequently. Like so many other things, her suggestion worked its way into my brain, and I succumbed to peer pressure. I started a pair of beautiful socks (out of Abstract Fiber's Temptation in "Snapdragon") with the express intention of finding out what all the hubbub around afterthought heels was about.

We were watching TV (The Good Guys, my current favorite show), and I decided to take pictures with my phone and tweet my progress.


IMG_0284
This is my sock, with the waste yarn placed where the heel should go, 7 inches in. Dog sleeping in background is not necessarily necessary to execute an afterthought heel, but is a snuggly option. If allergic, feel free to substitute with a cat. Or goldfish.

To get to the afterthought heel, I knit my sock to my total foot length, minus the length of two sets of toe decreases. If my foot is a total of 9 1/4", and my usual toe decreases are 1 3/4" long, that would be:

9.25 - 2(1.75)  = 5.75 (<- total length of the foot in inches, pre-toe)

(Do you get as excited about order of operations as I do? I'm going to assume so.)

Next, it's time to pick up stitches:


IMG_0285
Next step: Pick up stitches on either side of the waste yarn- or in this case, crochet cotton.
Do not, I repeat, DO NOT pull out the waste yarn in a moment of excited enthusiasm. Mom (whose hand is featured in the photo above) was very clear about that when I got feverishly excited about intentionally making holes in my knitting. Pick up your stitches FIRST.

IMG_0286
Like that. See? Two needles, stitches are all safe and accounted for.
Now comes the fun part. Mom says that if the waste yarn is slick enough, you can just slide it out. (I'm using mystery crochet cotton, since I'm pretty sure that Herself walked off with my sweet skein of beautiful, slick crochet cotton. She'll deny it, but I have my suspicions.)

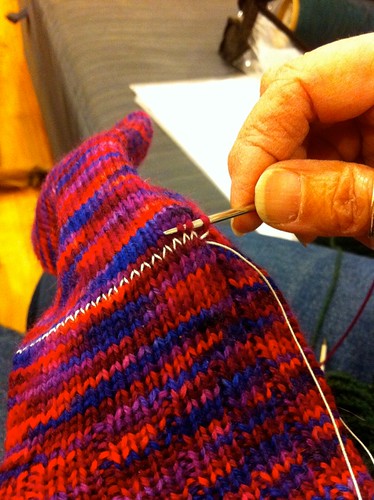
IMG_0287
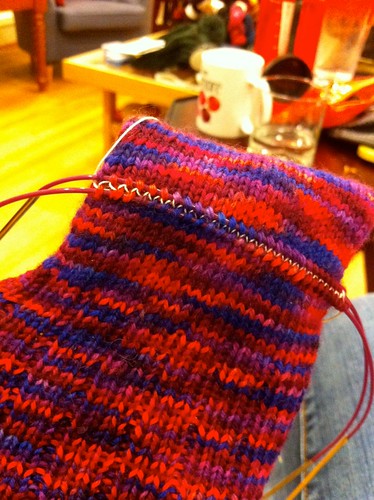
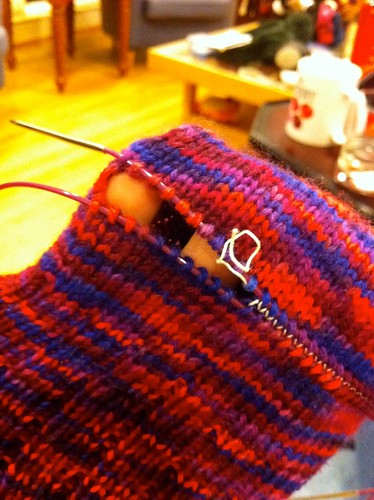
Next step: Unpick/slide out your waste yarn. Bonus points if you pretend you're a surgeon, since removing stitches is pretty much the same regardless of your subject.
I don't think anything could have made me happier than seeing my stitches, all tidy and heel-ready blossom open as I undid the waste yarn.

IMG_0288
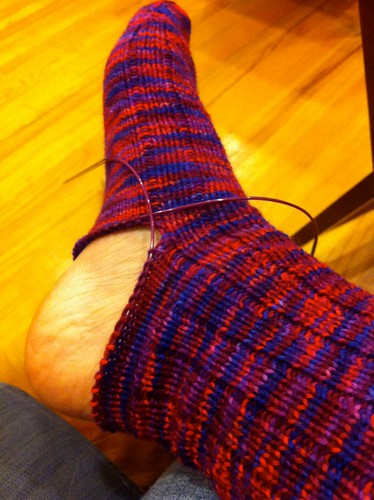
Try it on. Look, it worked!
From here, knit a toe the way you normally would. Use your best kitchener stitching skills on those final remaining stitches, and voilĂ !

IMG_0289
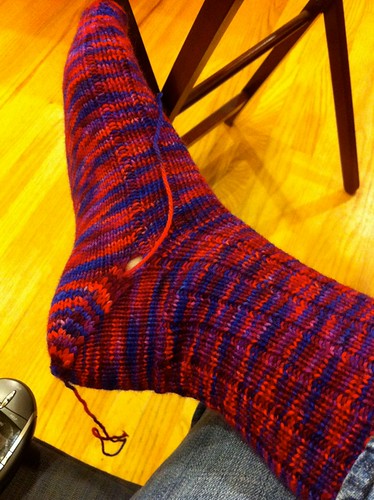
Heel!
So, there is a teeny-tiny hole at the side, but you'll notice the conveniently located tail, which I'll be using to close the hole before I weave it in.


And on that note, I'm going to go and start the second sock while the spirit moves me.

Monday, October 13, 2008

New Pathways in MY BRAIN!!!

A few years ago, I read that when you learn something new, it creates a wrinkle- or a pathway, in your brain. After the class I took with Cat Bordhi on Saturday, I'm feeling the effects cerebral wrinkles. Effects include:

1- An uncontrollable desire to drop everything I'm working on and knit a sock with a new architecture.

2- Daydreaming about knitting during other activities (working, meetings, spinning). Specifically, knitting a brilliant sock in handspun yarn.

3- Using the new sock as a carrot for finishing other tasks (like plying up the singles that have been resting).

4- Admiring the baby sock I did in class with vanity and pride beyond compare:

CB Sock -front

cb sock - side

I'll be honest- when I cast on my Footprint (a brilliant, simple architecture), it was 11PM, and the ONLY reason I didn't cast on something more challenging was because of the late hour. It seems to be going faster than a traditional sock. Since the construction was published in the Twist Collective (as the Houdini Socks), I'll let you explore it yourself.

Here is the process of my socks thus far:

(Two completed footprints, with the stitches picked up.)
houdini socks

(A close-up, so you can see for yourself.)
houdini sock cu

(Snip!)
houdini - first cut

(Opening up the stitches.)
houdini sock - opening

(Ta da!)
houdini sock - open


As far as the class is concerned, I recommend Cat as a teacher ANYTIME. Her background as a schoolteacher gives her the experience to pace the class so that the students absorb the most when they're fresh, and as the day went on, the material seemed to get simpler.

Despite the fact that there were 25(ish) students, all of us got one-on-one attention from Cat, and it seemed like all the students had that "aha!" moment. I haven't felt this smart in AGES!

Monday, June 9, 2008

Dear Technology

You may have thought that you had won. I may have admitted some defeat when I bought a book to help me figure out how to use two microphones with the same software. Since you were Apple software, I assumed that if I plug in two separate mics, you would automatically work.

As I learned, GarageBand, you are a plucky strumpet. Exhaustive internet searching yielded terms like “aggregate device” with directions on how to set up said aggregate device. But alas, no amount of microphone positioning would get rid of the satanic-sounding feedback. That was when I turned to the book.

I purchased the Idiot’s Guide to GarageBand. I have no real interest in recording music at this juncture, so about 75% of the book wasn’t relevant to me, but I pushed through. A couple of nights in bed with this book promised to solve all my problems. But, like any fickle creature, you disagreed. Fiddling yielded no success.

But yesterday, I defeated you. Ten feet of distance between mics, recording in mono (NOT in stereo), and monitoring the audio with headphones ended in SUCCESS. Now, Mom and I don’t have to sit on top of each other to both get picked up on the mic, and I can adjust the volume on the individual mics so that my voice doesn’t drown Mom completely out.

Perhaps next time you’ll remember this defeat, and not require the use of my tech-fu on you again.

You’ve been warned.

Your adversary,

Jasmin

Tuesday, May 6, 2008

It's [not] Hammer time!

I’m a one-tool kind of gal.

When Andrew and I got married, I brought a hammer into the marriage. An orange-handled hammer- not one of those sissified floral ones. It is a rugged, manly, hazard-orange hammer.

When something needs hammering, I’m there. I’ve learned how to re-sink the nails in the hardwood floor, remove baseboards, and any amount of demolition work – all with my trusty orange hammer. Until today, I hadn’t found any need for any other tools.

Sure, I can operate a drill, and I’m a whiz with an allen wrench, but the hammer is my one true love.

This morning, I was driving to an appointment, and my tape deck adapter (for my iPod) was having some issues. There are two little plastic gears on the inside (whose purpose was unknown to me, then), and when they get jostled (like when you hit a bump, brake enthusiastically, etc), they jam. That’s when the auto-flippy mechanism kicks in, and it tries to flip the “tape” direction until it can un-jam enough to keep rolling. (There is no actual tape, just a metallic connection where the tape would be.)

I pulled into the parking lot, a little early, pulled out the tape adapter, and looked at it. The hammer would not work for this fix.

Hmmm… a small, sharp implement might be able to wiggle the gears so that they are meshing exactly the way that tiny plastic gears are intended to.

I searched through my glove box, and found a pen. Too big.

At that moment, I saw the reflection off of the sock needle in my purse. PERFECT. With the tip of a size 1 ½ US needle, I wiggled and maneuvered the gear into place.

Step aside, hammer. A new era has begun.

Tuesday, April 8, 2008

Buffalo Gals Bison Review- Part One

Product: Buffalo Gals Bison

Product Description: Prepared Bison roving- natural brown

Bought From: Purlescence Yarns (gift from Katie for editing her college admissions essays). $21/oz. 2 ounces total.

Photos:

Bison- Skein

Bison- CU

Comments:

Initially, I was very nervous about spinning the bison. I spun a little when I took Judith MacKenzie’s comprehensive spinning class last April, but when it comes to spinning expensive fibers, I get a little… apprehensive. At $21/oz, the Bison falls into my definition of the “expensive fiber” category.

I spun it semi-woolen (long draw with the front hand doing some guiding to keep the yarn fairly even). I was instructed by Sandi (my personal Yoda) to add more twist to the singles (to essentially overspin them), which I did. I also plied it rather aggressively.

You can find the video of the fulling process HERE. In the video, it’s Yak, but I swear, I fulled the bison the EXACT same way, sans the overuse of the SOAK.

The bison is very soft, but has a smell. A gamey smell. It left my hands smelling pretty gross, but once my hands were washed, the smell was gone. I used the aquae scent of the SOAK, and that has mostly resolved the gamey smell of the bison yarn.

The bison had fair amount of guard hairs, and a little VM. I’ve spun much grosser stuff, but really, this wasn’t too bad as far as VM is concerned.

If you aren’t comfortable spinning short fibers (or aren’t comfortable with woolen spinning), buy the pre-spun Bison/Merino blend. I’ve been working on my woolen spinning, but deep in my heart, I know that I am a Worsted Spinner. I did a lot of deep breathing to do this, and I practiced on the yak first.

I ended up with 360 yds/2 oz- a respectable laceweight. This may become another Shetland triangle, since it needed a little yardage and knit up in four days. Or a Dragon Scale Scarf. You'll see part two of the review once I've knitted up the bison.

Monday, April 7, 2008

Fulling the Yak

I've been spinning quite a bit of short fibers. I've been spinning some yak, two ounces at a time, then plying it. Once the yak has been spun, plied, and wound into skeins, it needs to be fulled.

Fulling is super-fun. Here is the process, in my kitchen. Shot, produced, and starring me:


Once the yarn has been "shocked", we do some Agression Release Therapy:


And yes, I did say "Whack it."

Wednesday, April 2, 2008

It’s a spinning pro-cess

Jocelyn asked last week, amidst my chaos, how I prepare my roving, etc, before spinning. This depends on what my project is, and how the roving has been prepared.

The Royal Hare roving (that I’m spinning for socks) comes in tidy braids that are even thirds. I spin those, as is, since I like 3 ply yarn for socks. With other rovings (that come in a ball) I usually weigh out a third of the total weight (or and sixth of the total weight, if it’s Crown Mountain).

From there, I spin them on three separate bobbins, let them sit (at least overnight), ply them, let them sit (overnight), set them in the sink, let them air dry, label them, and either knit them or put them in the Big Bag o'Handspun.

If I’m spinning for a larger garment, I’ll weigh out my roving into 1 oz bumps, spin them up, let them sit, and then wind them off onto the smaller plastic bobbins. I use the longest length- 6”, and I can comfortably fit 1 oz per plastic bobbin. I use the plastic bobbins mostly because a bobbin for my wheel costs (approximately) $32, and each plastic bobbin costs (approximately) $1.15. If a Schacht bobbin holds 4 oz of spinning, and each plastic bobbin holds 1 oz of spinning, the difference in cost is huge- especially if you’re spinning a pound or two.

Once the total needed weight has been spun (note that this doesn’t always mean “all of the roving/fleece I have in that color”), I ply everything at once. This makes the end result more consistent- stuff I spun last year is bound to be (at least) a little different than the spinning I’m doing now. Another benefit of the plastic bobbins is that if one bobbin has a little more or a little less yardage, it is more easily corrected.

So, for example, here is some Merino that I bought from Judy’s Novelty Wool at Stitches West 2007 for a sweater for myself. These have been resting for a while, waiting for me to finish spinning and then whip out a sweater.

Mixed Berries

(These are all the same colorway. It's going to be stunning when it grows up to be real yarn.)

I’ve also started a vest for Andrew- it’s an Olive-y green BFL from Ashland Bay (“Fir” is the color). It may not look like much now, but it will get more exciting.

Fir

Fir- CU

Any more questions? I'm currently working on ounce 2 of 2 of some Buffalo Gals Bison roving. Mmmmm...


Monday, March 24, 2008

Per your request

Jocelyn requested details on how I spun the Creatively Dyed Yarn I reviewed last Thursday.

I spun it on my Schacht Matchless, Lancelot. (He likes to dance, a lot.) I spun the yarn on the Fast Speed whorl (on the 13:1 ratio whorl), and plied it on the Medium Speed whorl (on the 11:1 ratio whorl).

The individual strands were (more or less) abut 40 WPI- I held them up against my VIP fibers card, and I’m too lazy to count more than that. This is a roving that lends itself very well to fine spinning, but I’ve been working on thickening up my spinning.

(I spun some silk earlier this year at over 65 WPI and decided that counting very fine WPI is not my idea of a good time.)

I spun it worsted, with an “S” twist, and plied it “Z”. I let the singles sit on the bobbins overnight (at least), and once it was plied, I let the yarn sit on the bobbins overnight before winding up the skeins.

I set my yarn by filling my sink with warm water, a few drops of Soak, and I let it sit in that for about fifteen minutes. I squeeze the excess water out of the yarn, and then hang it to dry in my kitchen.

Once that’s done, I make a little label noting what the yarn is, what the yardage is, and what the color is. Then the finished yarn goes into the Bag O’Handspun.

A little OCD? Perhaps. Knitting OCD is a virtue, right?