Original: Steggie by Julia Farwell-Clay, from Knitty (Screenshots from the pattern included for reference)
Materials:
Yarn: Lisa Souza Pyrenees Worsted
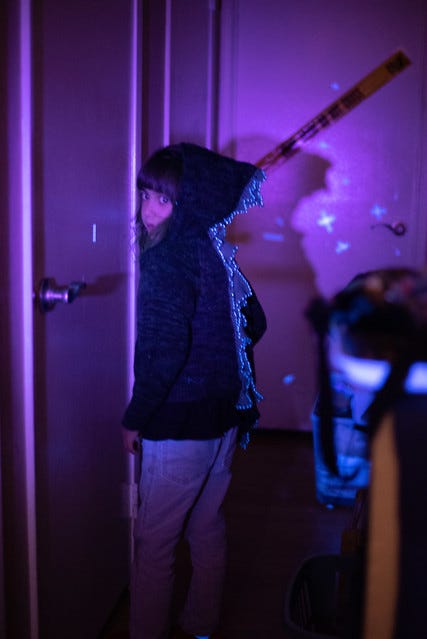
Beads: GLOW matte glass beads
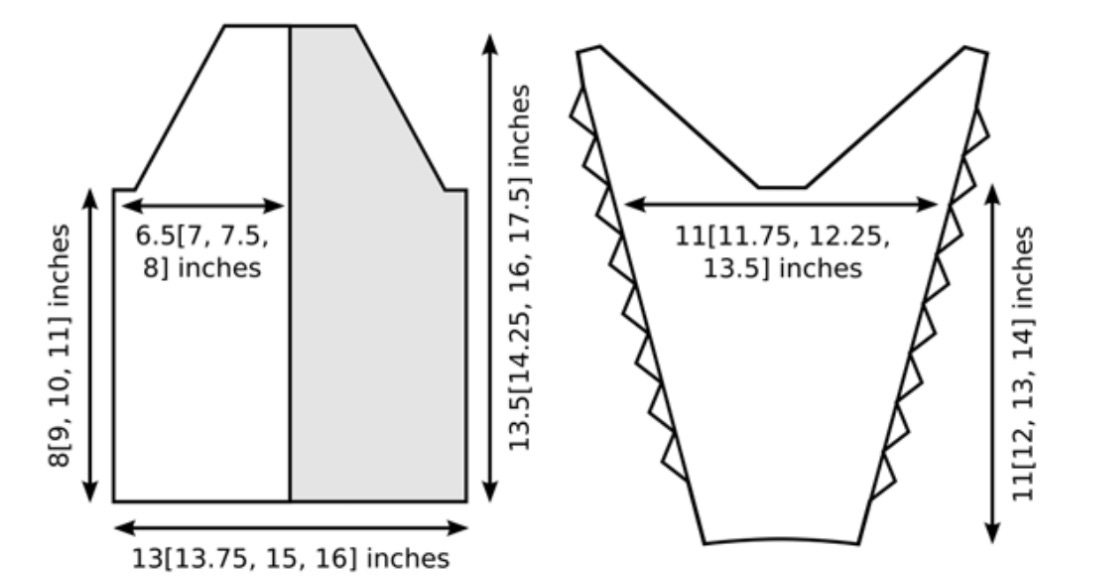
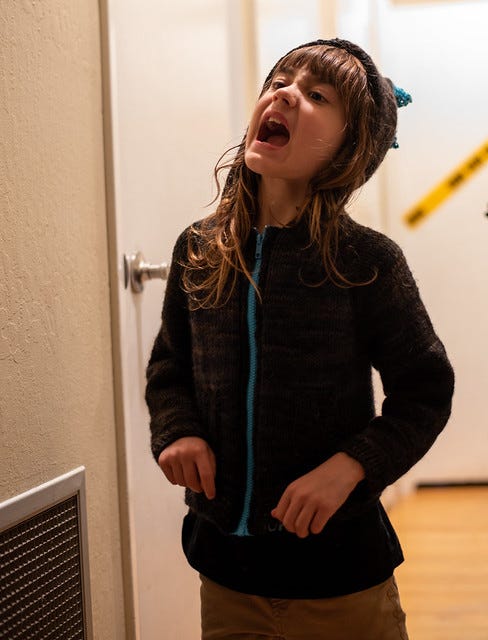
Reference, as supplied by the Client:

Construction:
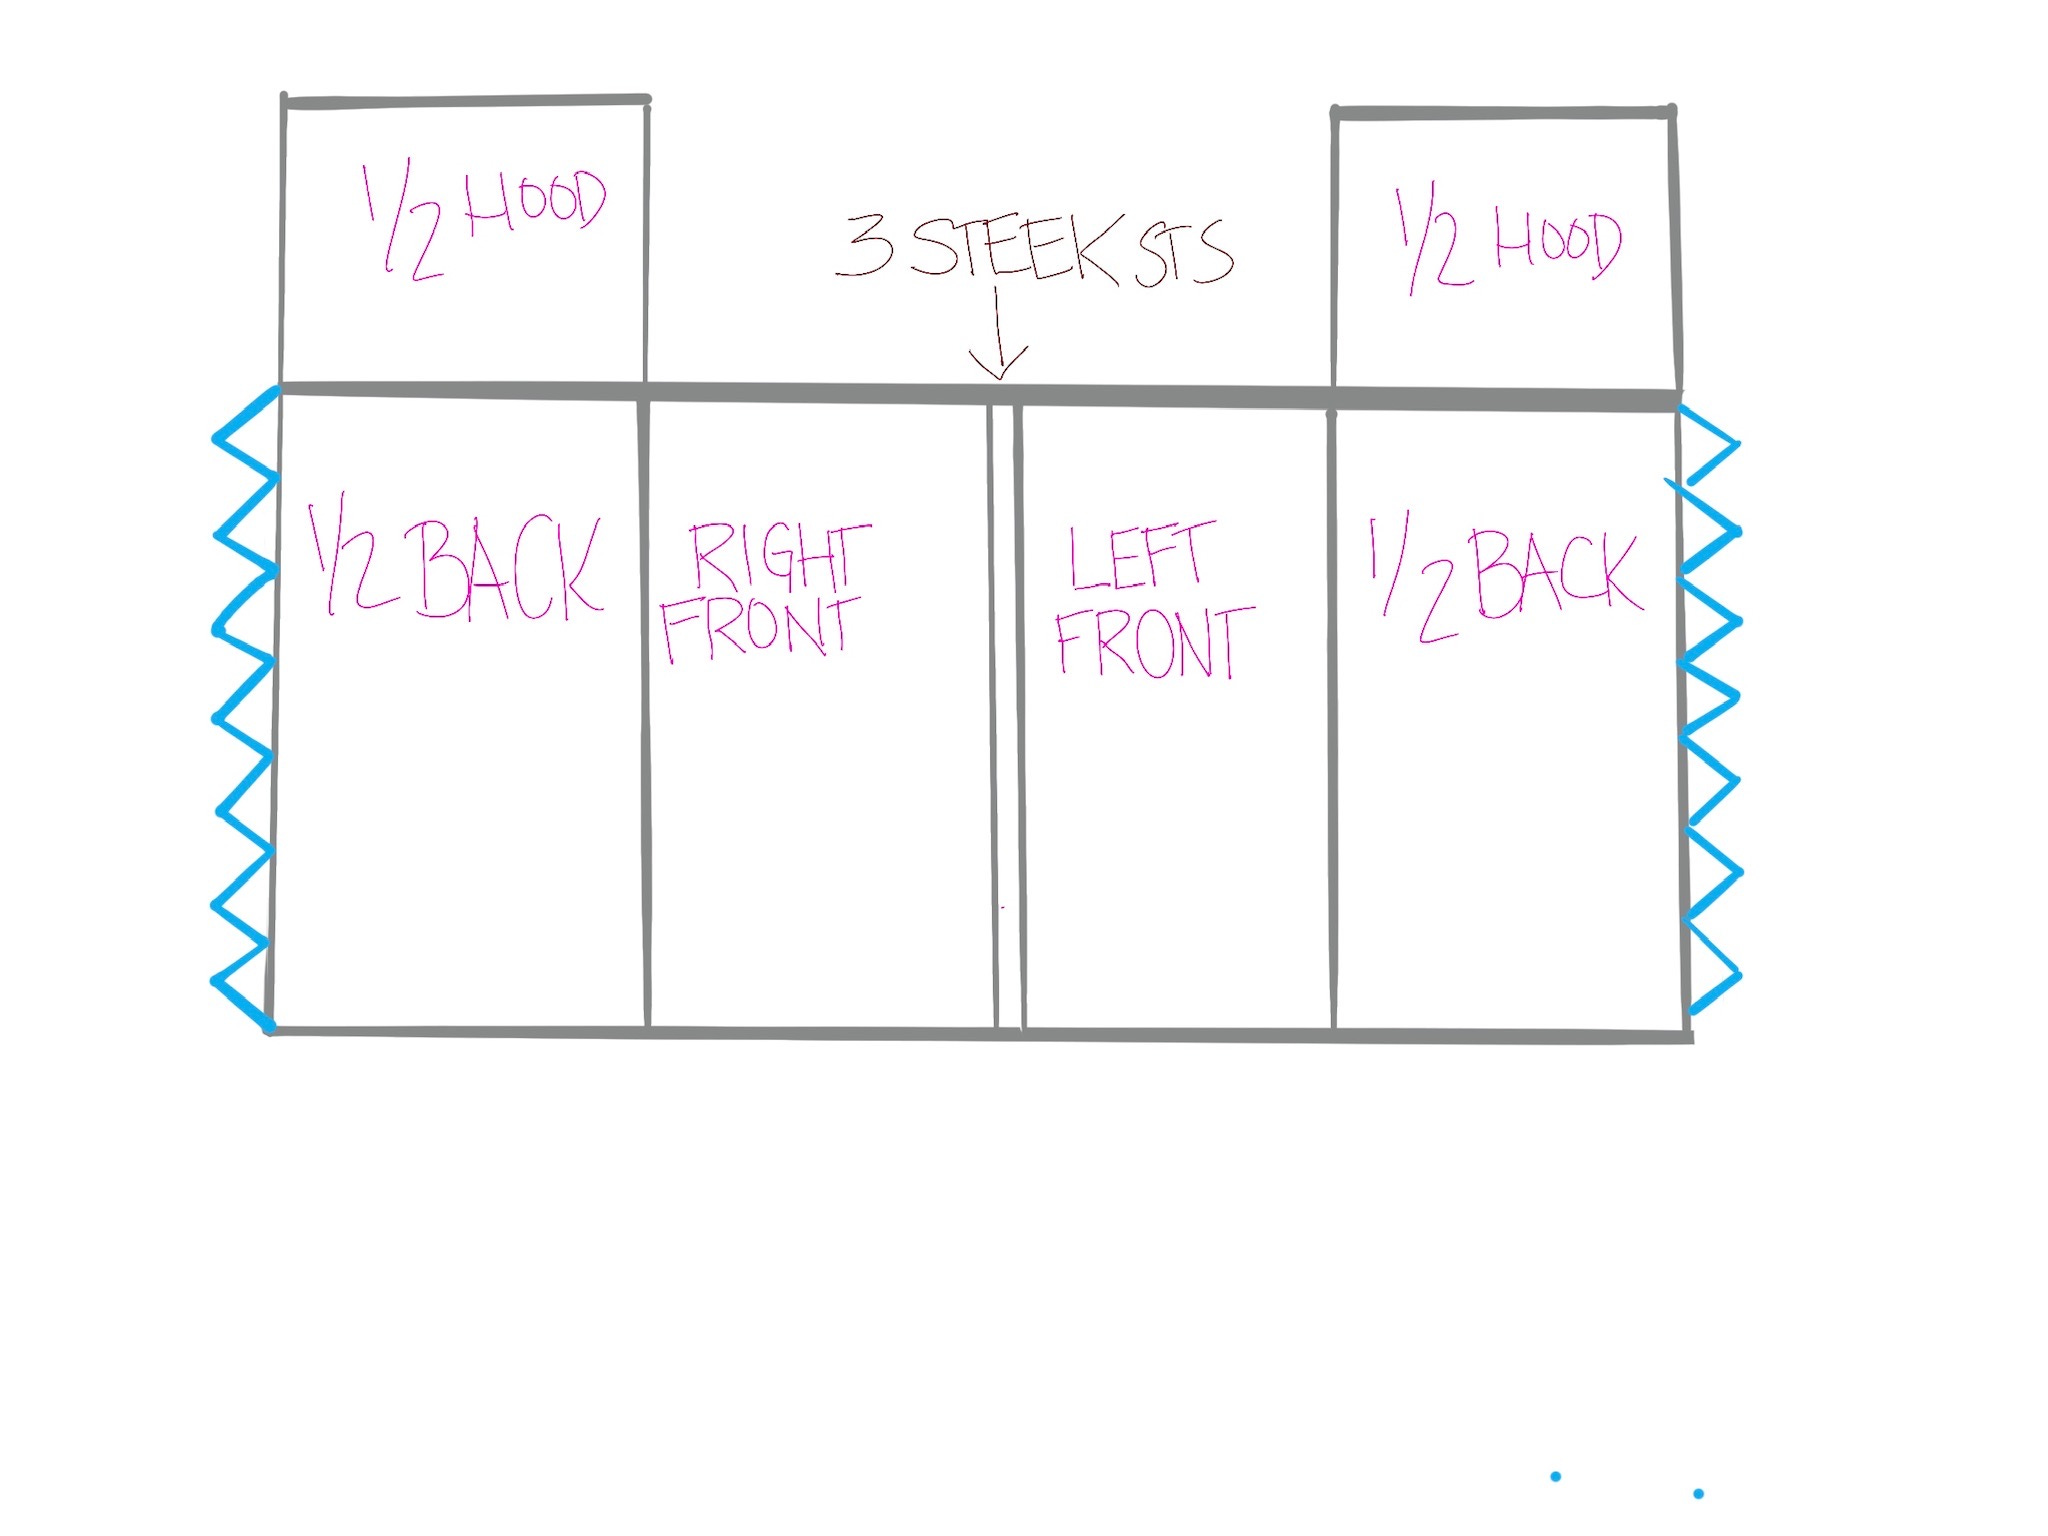
The original is made in pieces and seamed:
Mine is made is one piece, and seamed up the center back, with a three stitch steek in the center front:
The plates on Godzilla are up the center back (as opposed to the sleeves), and applied using an afterthought i-cord style-ish attachment as follows:
Drop down to a US size 6/4.00mm needle for the plates
work to 1 st before the end, sl1, pick up 1 st from edge, pull slipped stitch over the last st, turn. (I omitted the YO in the final version.)
pick up 1 st from edge, purl that st together with first spike stitch.
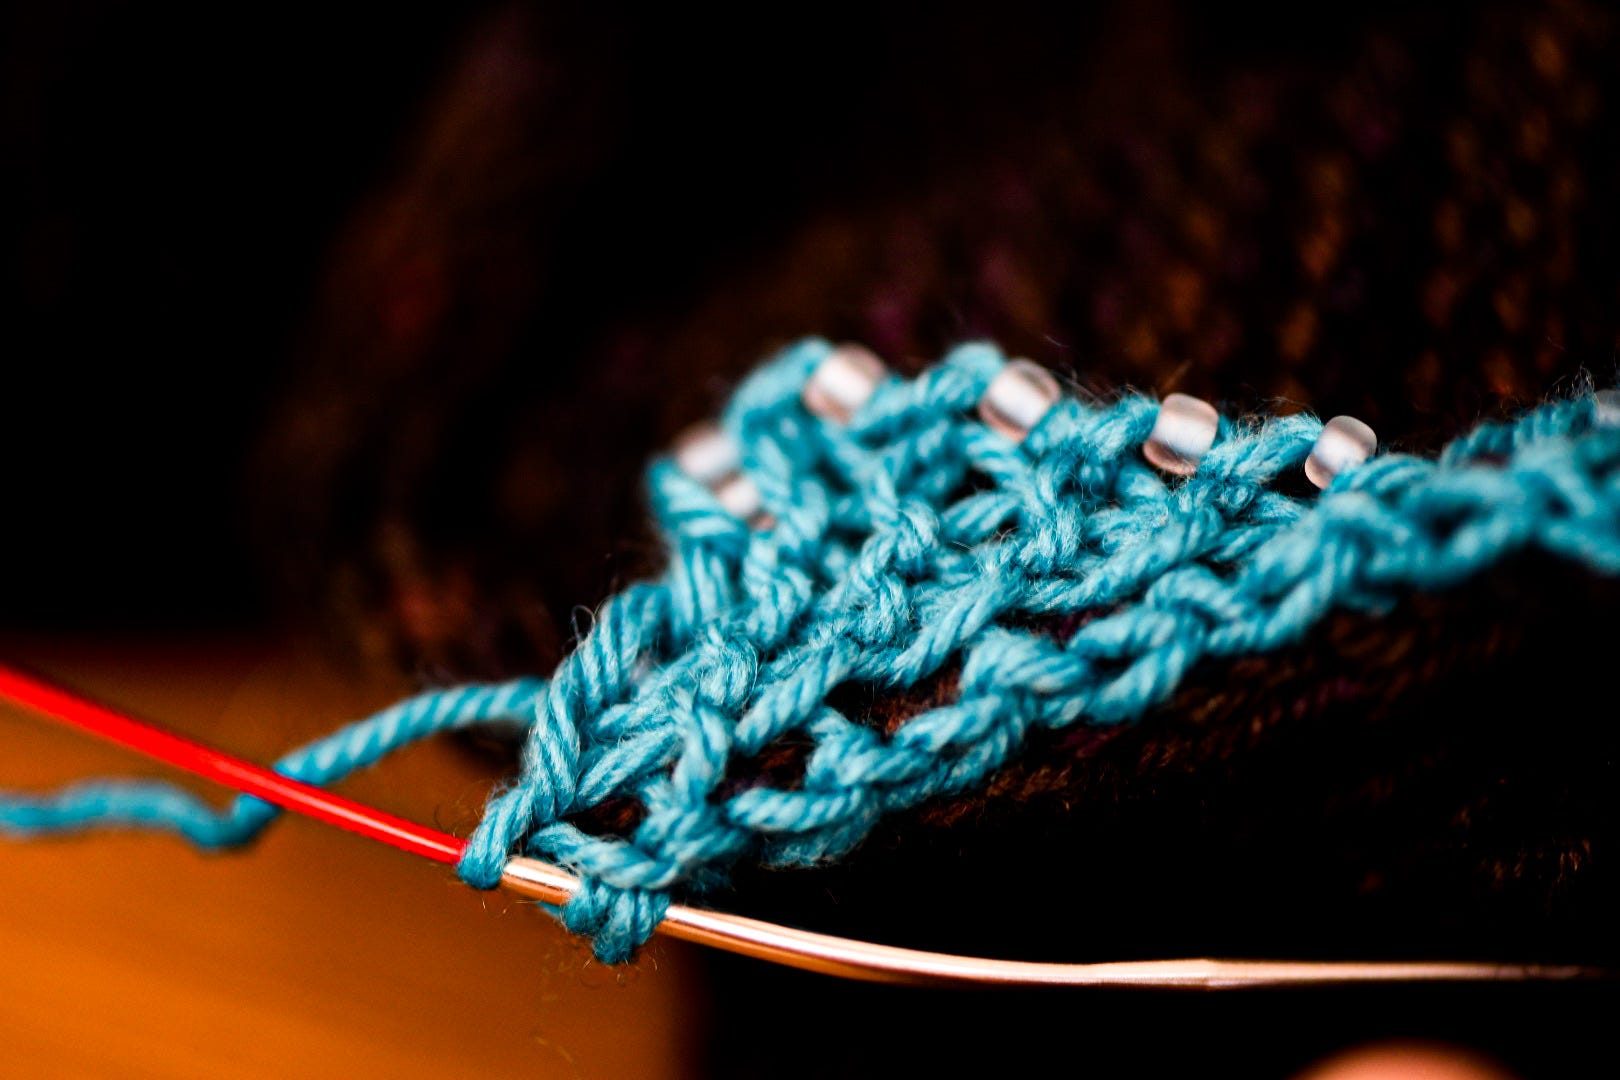
Additionally, I added one bead on the edge of every RS row, and well as on all bound off stitches on top edge of the plates:
Tail:
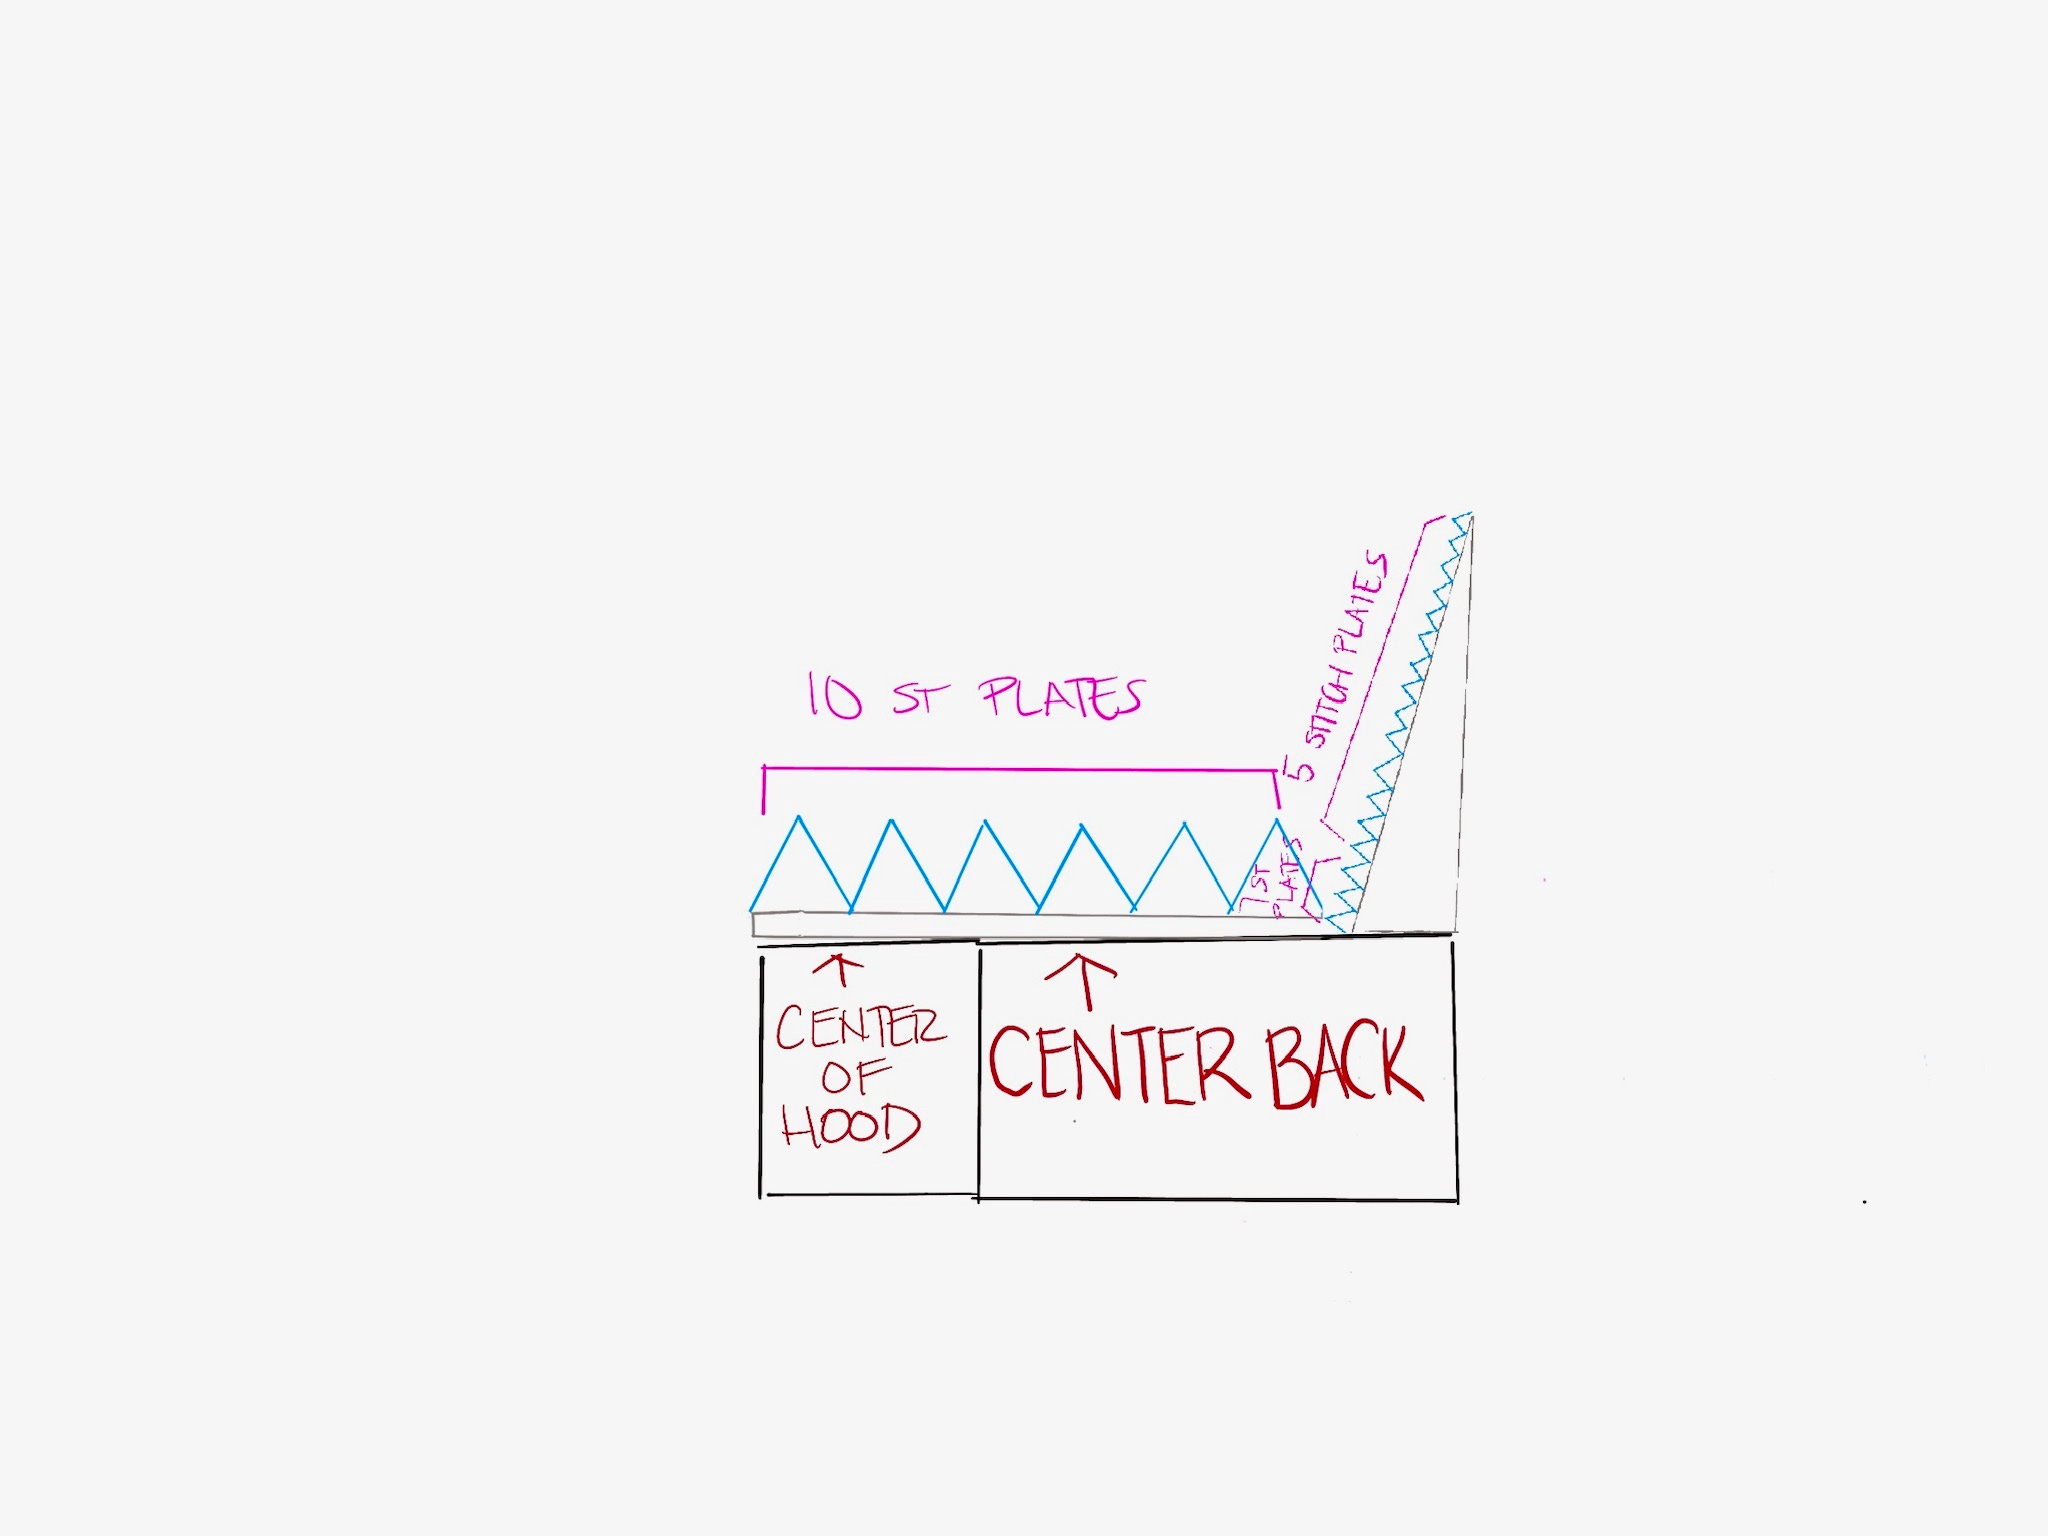
Work 5-stitch plate in CC with 1 st MC.
Increase 1 st at plate edge in MC every 4 rows until the tail is a bit longer than you’d like.
Work mostly 5 stitch plates on the tail, until you’re nearly at the length you want the tail bit to be, then work a few 7 stitch plates.
Bind off all but 2 MC sts and begin working 10 stitch plates. Work in this style until the length of the bottom edge of the bind off and the top of the back plates match the length of the back of the sweater all the way up the back of the hood.

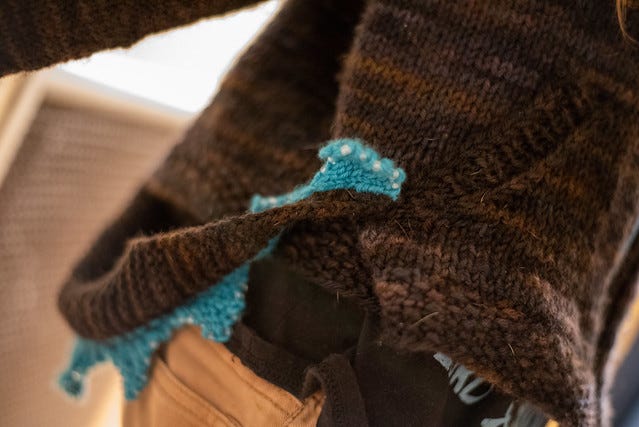
It looks a bit strange, and it’s a little hard to describe, so I’ve included a drawing of how I did it.
I attached the bound off edge of the tail to the center back of the cardigan, and then used a running stitch to sew the MC portion of the tail to one side of the back, all the way up to the hood. (The smaller five stitch plates end up staggered from the center 10 stitch plates; which is most excellent.)
Once that was joined, I used a tidy running stitch to attach the other side of the back, using the running stitch to go through all three layers (back, tail, back).
I sewed the steek in front, two rows of machine stitches on each side, cut the steek, placed the zipper with Wonder Clips, basted it in place with red thread, then sewed it into the sweater using a backstitch.
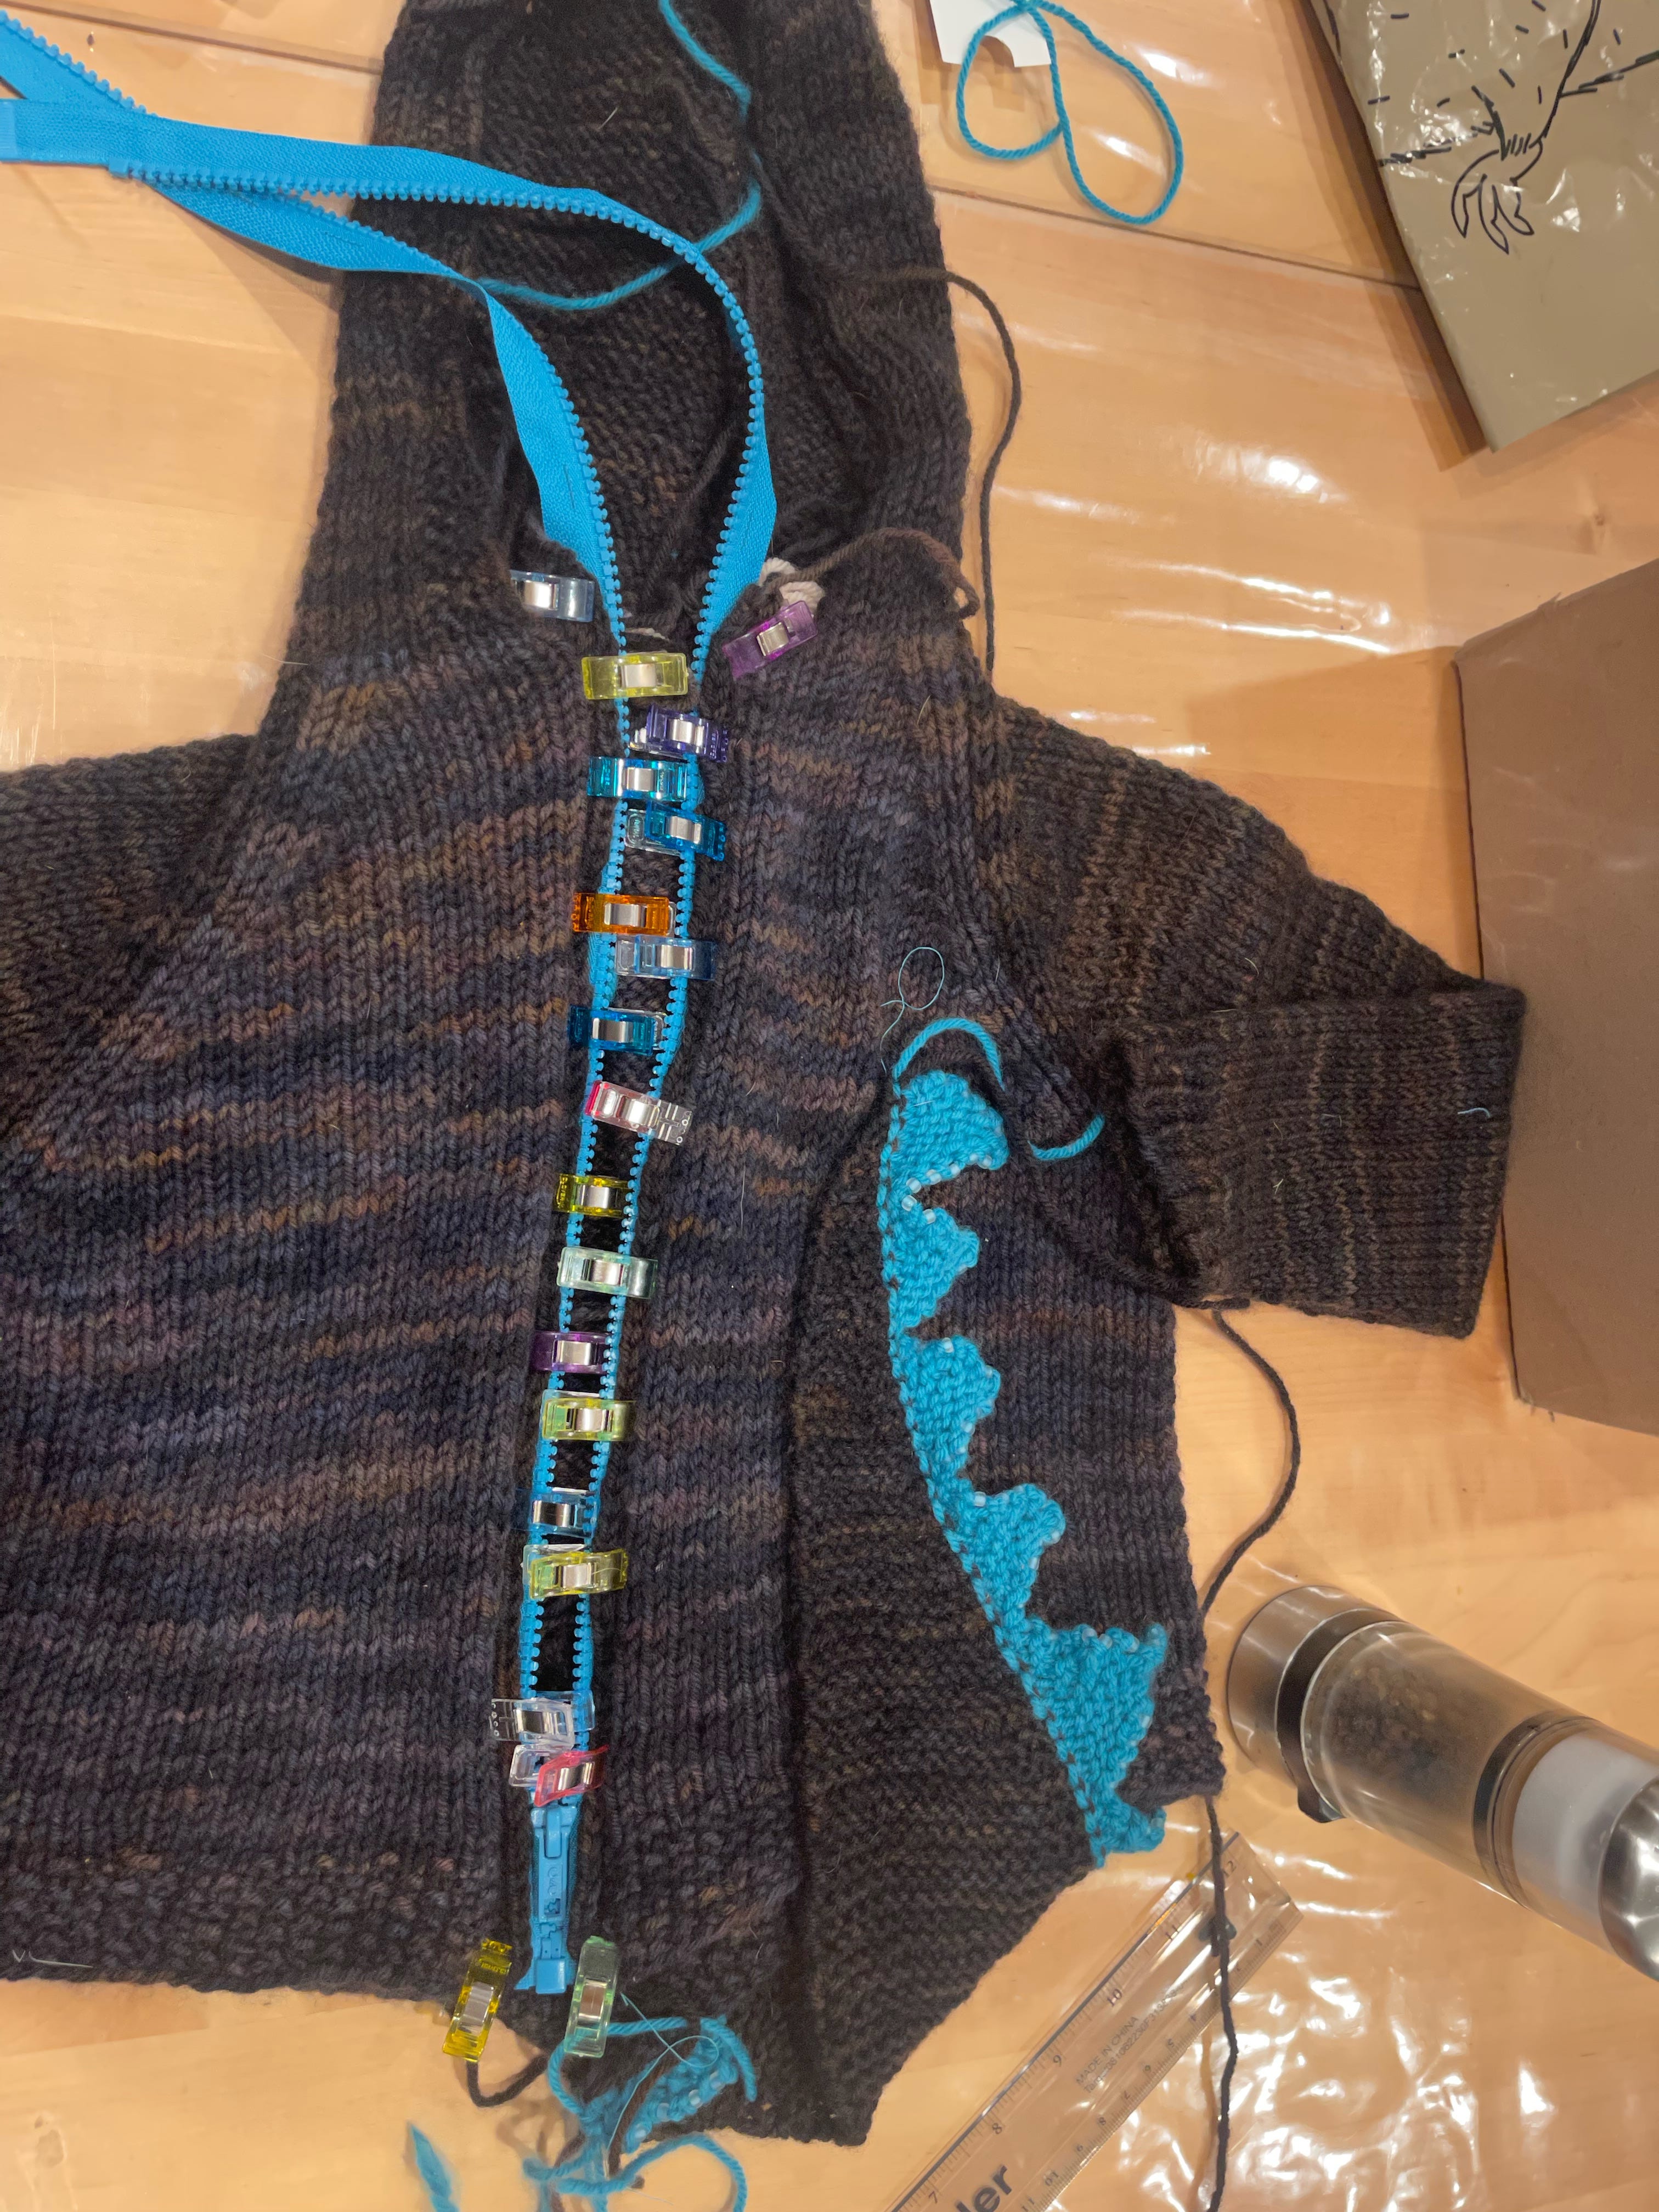
I attached half of the snap to the end of the tail, and the other half juuuuuuust inside the pocket, so that the tail would be safe from accidental toilet dipping.
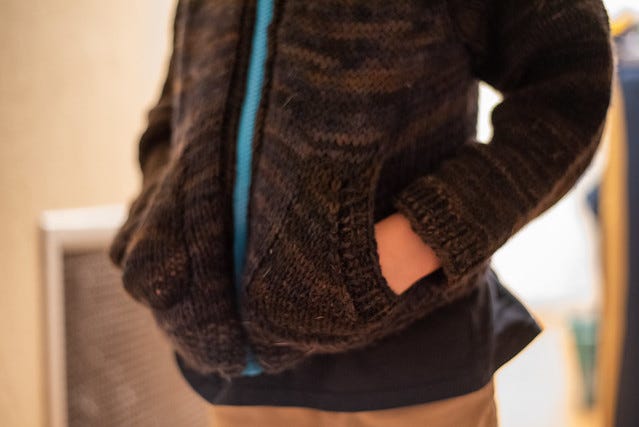
Pockets:
Pick up 15 stitches, 4 stitches up from the edging and 4 rows in. Work 1” in st st, then do 1 full fashion decrease at open edge twice, then every RS row until 6 sts remain. BO, then pick up 3 sts for every 4 row along open edge. Work in 1x1 rib for 1”; bind off. Seam to sweater using a tidy mattress stitch.
We also tested the blacklight reactive beads:


No comments:
Post a Comment
If you'd like me to respond, please make sure to put your email address in the field. :)